How to Start an ATV that has been Sitting to Move Again
Any person with an old ATV that has just been laying right there for years, might wonder how challenging it would be to start an ATV that has been sitting. But is it really tough, Let’s find out.
Getting the right tools is also another tough aspect, so you have to strictly follow this guide so you can get your machine back to its old self.
When your ATV sits for a long time completely idle the oil and fuel might begin to separate in form.
The tires will definitely lessen, and the battery will also be affected. If the machine has been out without any form of coverage, then you are going to have more problems with your hand.
We’ve compiled a list of things you need to check on; further details will be given as you read. Here’s how to start a four-wheeler ATV.
How to Start An ATV That Has Been Sitting
- Drain the fuel tank and remove all dirt
- Clean the carburetor
- Replace air filter
- Change engine oil
- Replace the spark plugs
- Get a new battery
- Drain out the differential fluid and replace
These steps will get your ATV up and running if you do it right.
There are also some troubleshooting procedures that we will reveal later on, just it still doesn’t work with this approach. Let’s go over the procedures in detail.
Drain the Fuel Tank and Remove All Dirt
Suppose your ATV has sat for up to six months without being touched, you have to get a new gas in there; first, drain out the old one and do some sort of cleansing.
Fuel degrades with time, is less combustible, and you might find it starts to gum up. Water can also condense and accumulate in a fuel tank that has sat for too long.
You have to drain the tank completely, then clean out all the gummed-up or gelled gas. The residue also affects the fuel lines, including other parts of your ATV fuel system.
You will check your fuel filter; replace or clean it if no damage has been done.
Ensure that the fuel or petcock valves are all functioning properly. Turn the valve on to make sure that they are operating optimally, and that there isn’t any leak.
If it is a metallic tank, the water condensation can cause rusting of the interior walls of the tank. Pour some liquid cleanser/rust removal into the tank and shake around.
You should have the rust washed away and your tank looking good as new.
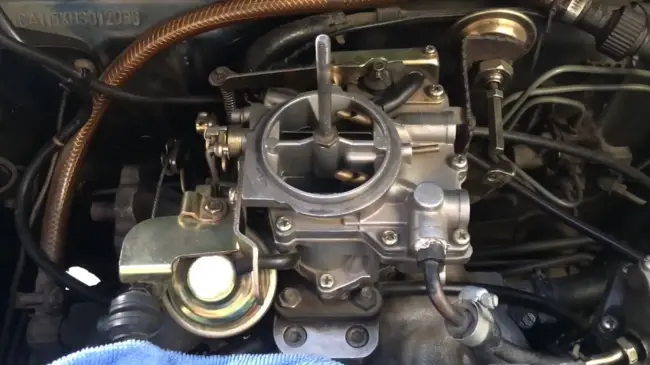
Clean the Carburetor
If your ATV comes with a carburetor, then you will have to clean it out thoroughly. You can get a carburetor rebuild tool kit since you will be taking the carburetor out.
Spray some cleaner in there, and also use the rebuild kit because spraying might not be enough.
We recommend that you rebuild a carburetor that has just been sitting there. Inspect the fuel line that runs from your tank to the carburetor. If you can push fuel to go through the fuel line; that would really help.
But if the flow isn’t continuous to properly clean out the fuel lines, then you have to replace the lines. After cleaning the carburetor and tank you should be fine.
Replace Air Filter
The air filter must be in good shape if you have to reuse the filter. But we would advise that since it has stayed that long, it’s best to replace it. Although reusable filters can be left in.
It is very affordable to replace your old filter if you have to; they are cheap.
If you are keeping the reusable filter, then you have to ensure you know how to properly clean filters. You can look up a guide on how to do this to help you out.
Whichever decision you make concerning your filters, ensure your engine won’t be sucking in dirt, or dust through your intake.
The small amount of debris can affect your cylinder walls and that would cause real problems for your engine. Since your ATV has been sitting, dust, sand and dirt are most likely in there. You need to sort it out.
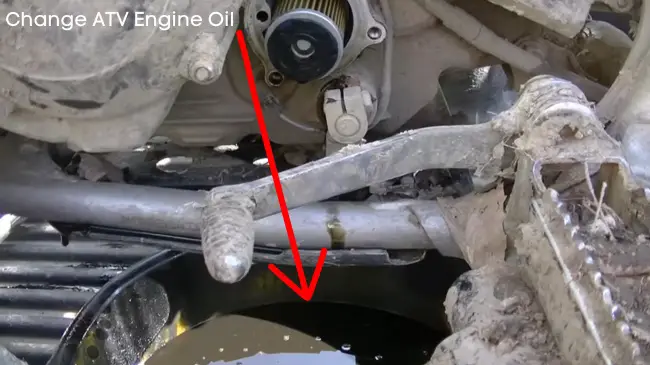
Change Engine Oil
Engine oil takes a while before it gets bad in your tank, but the additives degrade with time; making it less effective. Since you are meant to change your oil at specific intervals anyways, it only makes sense to change the oil in this case.
Ensure you get the right oil in there. Most people might prefer using synthetic oil because it has additives that would help make your gaskets swell, preventing leaks and avoiding compression in your engine.
It is not a bad idea, but it is always best to go for your vehicle’s manufacturer’s oil preference.
Changing the oil filter would also make this step very effective. It is always good to change your oil filter after changing your oil, although it isn’t that convenient, it’s worth it.
The old filter can be storing junk that would contaminate the new oil; so it’s just best to cross that out.
Allow the new oil to sit in for a while, you can even turn it over to ensure every part gets soaked on. Getting the spark plugs makes this easier.
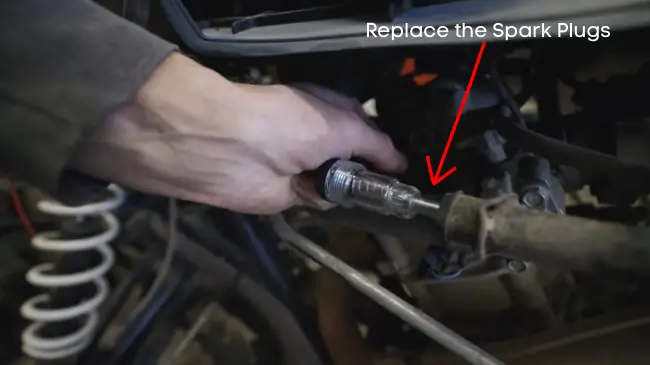
Replace the Spark Plugs
The plugs on your ATV might not be necessarily bad after that long period of no work, but you just have to change the plug.
We won’t take any chance of failure towards getting the right spark to the engine, so this is a good step.
For a quick inspection, take out the plug from your engine, put it back into the plug wire, keep the electrode on the spark plug close to the frame or engine, and then try to start the ATV.
If sparks jump out from the electrodes on the plug, then you are good.
If your engine doesn’t get any spark even after changing the plugs, then it is a deeper electrical fault that needs professional assistance. Ensure you get the right plug.
Get a New Battery
Based on the duration your ATV had to sit idle, you might need to change your battery.
However, you should try it again after recharge and see if it works. But anything more than one year, you definitely have to change it. You can get your ATV battery at any auto parts store in your local area.
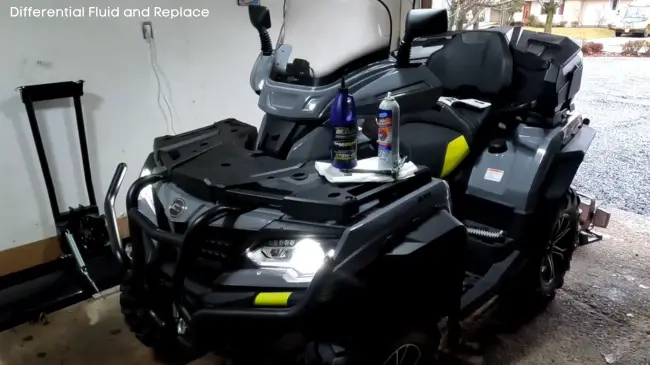
Drain Out the Differential Fluid And Replace
You can use this step for 4×4 ATVs only, and sometimes it is not necessary. Just because you are changing other fluids, it only seems right to change the differential fluid also. The process is also straightforward.
There’s the front and rear differential, you will have to change the oil in both of the differentials.
The best choice for differential oil is to use the right specification for the machine. You have your service manual to get this information.
Different kinds and different manufacturers recommend various oils. Using the wrong specification can affect your differential.
Once you’ve got the right oil, all you need is a pan and some wrenches. There is an inspection plug and also a drain plug for your rear and front differentials.
Remove the drain plug first, and allow the entire differential oil to drain out. Suppose you see some metal shavings in the oil, you could have a problem with the gearing.
When the oil is drained out, place the drain plug back in, and then remove the inspection plug. This is where you pour the new oil.
Using a funnel is necessary. Fill until the oil comes out from the inspection hole. Drain out till it doesn’t trickle, and then change the inspection plug. Do this for both your rear and front differentials.
Wrap-up
Now you know you can start that abandoned ATV of yours kept for a long time. You don’t have to throw it away, or dismantle it, just follow our guide to try to get your ATV to its old ways.
There’s a very high chance that your ATV will be brought back to life. Just in case you still can’t get it started, consult a professional for help just to be sure of the ATV’s state.


