How to Replace Rv Awning Fabric
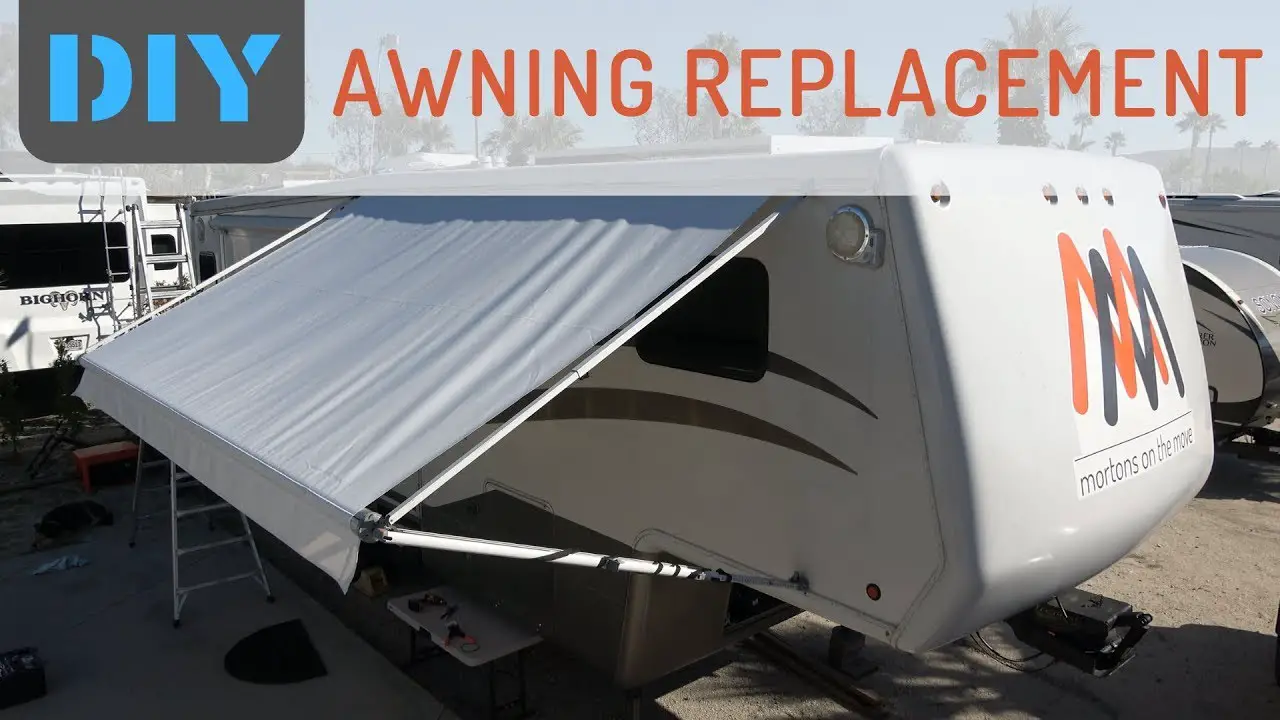
To replace RV awning fabric, start by removing the existing fabric and hardware, then measure and cut the new fabric to fit the awning frame, and finally, attach the new fabric and reassemble the hardware. Replacing the fabric on your RV awning is a straightforward process that can greatly improve the appearance and functionality of your outdoor space.
In this guide, we will walk you through the steps to replace your RV awning fabric, allowing you to enjoy shade and protection from the elements while on your travels. By carefully following these steps, you can easily replace your RV awning fabric and ensure that your awning looks and functions at its best.
So let’s get started and restore the look and convenience of your RV awning.
Factors To Consider When Selecting Rv Awning Fabric
When selecting RV awning fabric, there are several factors you should consider. First and foremost, durability is key. The fabric needs to be able to withstand the elements and heavy use without tearing or fraying. Look for fabric that is made from high-quality materials and has reinforced stitching for added strength.
UV protection is another important factor to consider. The fabric should be able to protect you and your RV from harmful UV rays, which can cause fading and damage over time. Look for fabric that has a high UV protection rating and is specifically designed to block out the sun.
Color and design options may also be important to you. Choose fabric that matches your RV’s style and aesthetic. Many manufacturers offer a wide range of colors and patterns to choose from, so you can find the perfect fabric to suit your taste.
Finally, ease of installation is something to think about. Look for fabric that is easy to install and comes with clear instructions. This will make the replacement process much smoother and less time-consuming.
Measuring Your Rv Awning For A Replacement
Replacing the fabric on your RV awning is a simple task once you know how to measure it correctly. Follow these steps to ensure a perfect fit for your replacement fabric.Measuring your RV awning for a replacementGathering the necessary tools: To replace your RV awning fabric, you’ll need a few tools. Before you begin, gather these essential items: – Tape measure: A reliable tape measure is crucial for accurate measurements. – Step ladder: Depending on the height of your RV, a step ladder may be necessary to reach the awning. – Marker or chalk: A marker or chalk will help you mark the measurements on the fabric. – Notepad: Keep a notepad handy to jot down the measurements for reference. – Partner: Having a helping hand can be useful when measuring the awning and handling the fabric. Measuring the width and extension of the awning: 1. Extend the awning fully and measure the width from one edge to the other. Take note of this measurement. 2. Next, determine the extension by measuring from the RV’s outer edge to the furthest point the awning reaches when fully extended. Determining the roller tube size: 1. Locate the roller tube, typically found on one end of the awning. 2. Measure the diameter of the roller tube accurately. With these measurements, you’ll be ready to search for the perfect replacement RV awning fabric to restore your awning to its former glory. Remember to take precise measurements to ensure a proper fit.
Removing The Awning Fabric From The Roller Tube
Removing the awning fabric from the roller tube:
1. Extend the awning completely to expose the entire fabric.
2. Locate the tension settings of the awning fabric. These settings are usually found on the roller tube.
3. Release the tension by following the instructions provided by the manufacturer. This usually involves loosening the awning arms and removing any locking pins or clips.
4. Carefully remove the fabric from the roller tube. Be cautious to avoid any tears or damage.
5. Once the fabric is removed, inspect it for any signs of wear or damage. If necessary, replace the fabric with a new one.
6. Reinstall the awning fabric by reversing the steps above, ensuring that it is properly tensioned and secured to the roller tube.
| Steps | Description |
|---|---|
| 1. | Extend the awning completely to expose the entire fabric. |
| 2. | Locate the tension settings of the awning fabric. These settings are usually found on the roller tube. |
| 3. | Release the tension by following the instructions provided by the manufacturer. This usually involves loosening the awning arms and removing any locking pins or clips. |
| 4. | Carefully remove the fabric from the roller tube. Be cautious to avoid any tears or damage. |
| 5. | Once the fabric is removed, inspect it for any signs of wear or damage. If necessary, replace the fabric with a new one. |
| 6. | Reinstall the awning fabric by reversing the steps above, ensuring that it is properly tensioned and secured to the roller tube. |
Detaching The Awning Fabric From The Rv
To replace the RV awning fabric, start by detaching the fabric from the RV. This can be done by removing the screws or bolts securing the fabric in place. Take your time and be careful during this process to avoid any damages or accidents. Once the fabric is detached, make sure to take note of any additional attachments or accessories that need to be removed before replacing the fabric. This may include things like lights or curtains that are attached to the awning. By following these steps, you can successfully detach the awning fabric from your RV and prepare it for replacement.
Positioning The Replacement Fabric On The Rv
In order to replace the fabric on your RV awning, it is important to ensure that the fabric is aligned correctly. Start by positioning the replacement fabric on the RV, making sure that it is centered and evenly distributed. Carefully align the fabric with the existing holes and tracks on the RV, if applicable. This will help to ensure a proper fit and prevent any potential damage to the fabric during installation.
Once the fabric is positioned correctly, secure it to the RV using screws or bolts. This will help to keep the fabric in place and prevent it from shifting or coming loose while the awning is in use. Make sure to use the appropriate size and type of screws or bolts for your particular RV awning.
By following these steps, you can successfully replace the fabric on your RV awning and ensure that it is aligned correctly for optimal performance and durability.

Credit: roadslesstraveled.us
Attaching The New Fabric To The Roller Tube
Attaching the new fabric to the roller tube:
- Start by aligning the fabric with the roller tube and inserting the fabric into the groove.
- Make sure the fabric is centered and the edges are aligned properly.
- Retract the awning partially to create tension in the fabric.
- Check if the tension is sufficient and make adjustments as needed.
- Once the fabric is tensioned properly, secure it to the roller tube.
- Use the appropriate screws to fasten the fabric securely without causing any damage.
- Make sure the screws are tightened evenly to avoid any wrinkles or sagging in the fabric.
By following these steps, you can successfully replace the RV awning fabric and ensure a secure attachment to the roller tube.
Testing The Awning’s Functionality
Testing the awning’s functionality is an essential step when replacing RV awning fabric. Start by extending and retracting the awning several times to check for smooth operation. Pay attention to any sticking, squeaking, or jerking movements that may indicate underlying issues. It is crucial to ensure that the fabric rolls evenly onto the roller tube throughout the extension and retraction process. This prevents excessive wear and tear and prolongs the lifespan of the new fabric. Take note of any fraying, tears, or damages on the fabric during the testing process. Identifying these issues early on allows for prompt repairs or replacement to prevent further complications.
Making Necessary Adjustments
When it comes to replacing RV awning fabric, making necessary adjustments is crucial. One important adjustment to consider is adjusting the fabric tension if needed. This can be done by loosening or tightening the tension knobs located on the RV awning arms. By aligning the fabric properly, you can ensure a straight appearance. Start by unrolling the awning completely and checking for any wrinkles or sagging. If the fabric is loose, tighten the tension knobs in small increments until the desired tension is achieved. On the other hand, if the fabric is too tight, loosen the knobs gradually. Keep in mind that proper tension is important for the longevity of the fabric, ensuring its durability against wind and other outdoor elements.
Regular Cleaning And Maintenance Tips
Regular cleaning and maintenance of RV awning fabric is essential to ensure its longevity and functionality. To keep the fabric clean, use mild soap and water. Avoid using abrasive cleaning materials that can damage the fabric. Gently scrub the fabric with a soft brush or sponge and rinse it thoroughly.
In addition to regular cleaning, inspect the fabric regularly for any tears or damages. If you find any, repair them promptly to prevent further damage. Small tears can be sewn together using a heavy-duty thread, while larger damages may require patching or professional repair.
Maintaining your RV awning fabric will not only extend its lifespan but also enhance your overall camping experience. By following these simple tips, you can keep your awning in great condition for years to come.
Frequently Asked Questions On How To Replace Rv Awning Fabric
How Long Does It Take To Replace Rv Awning Fabric?
Replacing RV awning fabric usually takes about 2 to 4 hours, depending on your level of experience and the size of your RV. It is recommended to set aside enough time and gather all the necessary tools and materials before starting the replacement process.
What Tools Do I Need To Replace Rv Awning Fabric?
To replace RV awning fabric, you will need a few essential tools such as a drill, ladder, pliers, tape measure, utility knife, and a helper. It is also helpful to have a stable surface to work on and some basic safety equipment like gloves and eye protection.
Can I Replace Rv Awning Fabric Myself Or Should I Hire A Professional?
Replacing RV awning fabric is a task that can be done by yourself if you have some basic DIY skills and experience. However, if you feel unsure or uncomfortable with the process, it is recommended to hire a professional to ensure the job is done correctly and safely.
What Are The Signs That Indicate Rv Awning Fabric Needs Replacing?
Signs that indicate RV awning fabric needs replacing include tears, holes, fading, mold or mildew growth, and difficulty in retracting or extending the awning. If you notice any of these signs, it is advisable to replace the fabric to prevent further damage and maintain the functionality of your RV awning.
Conclusion
Replacing the RV awning fabric can be a simple and cost-effective solution to ensure the longevity and functionality of your awning. By following the step-by-step instructions provided, you can easily replace the fabric yourself and save money on professional repairs.
Regular maintenance and proper care will ensure your RV awning remains in good condition for years to come. Take the first step in improving your outdoor camping experience by replacing your RV awning fabric today!


