Repairing Rv Roof Leaks
Repairing RV roof leaks can be done by identifying the source of the leak and sealing it properly. In order to fix an RV roof leak, it is important to identify the source of the leak and make the necessary repairs to prevent any further damage.
This can be done by inspecting the roof for any cracks, holes, or damaged areas, and applying sealant or patching materials to fix the issue. It is crucial to use the right products and techniques to ensure a proper and long-lasting repair.
Ignoring or delaying the repair of an RV roof leak can lead to extensive damage to the interior of the vehicle, so it is best to address the issue as soon as possible.
Common Causes Of Rv Roof Leaks
RV roof leaks can be a hassle to deal with, but understanding the common causes can help prevent and repair them. Aging and wear are one of the main culprits behind RV roof leaks. Over time, the roof materials can deteriorate, causing cracks and gaps for water to seep through. Poor installation or maintenance is another leading cause of RV roof leaks. If the roof was not installed correctly or not properly maintained, it can develop weak spots and vulnerabilities. Damage to seals or seams can also result in leaks. Harsh weather conditions or accidents can cause these seals to weaken or break, allowing water to enter.
Signs Of A Roof Leak In Your Rv
Are you noticing any signs of a roof leak in your RV? Keep an eye out for water stains or discoloration on the ceiling or walls. These marks can indicate that there is moisture seeping through the roof. Another sign to watch for is a damp or musty smell inside the RV. If you notice a lingering odor, it could be a sign that water is infiltrating the interior. Additionally, pay attention to any bubbling or peeling wallpaper or paint. This can be a result of water damage causing the adhesive to deteriorate. Taking prompt action to address these signs of a roof leak is crucial in preventing further damage to your RV. By promptly repairing the roof leak, you can protect your investment and ensure that your RV remains in optimal condition.
Tools And Materials Needed For Rv Roof Leak Repair
Tools and Materials Needed for RV Roof Leak Repair:
| Roof sealant | Scrub brush | Putty knife |
| Roof patching material | Caulking gun |
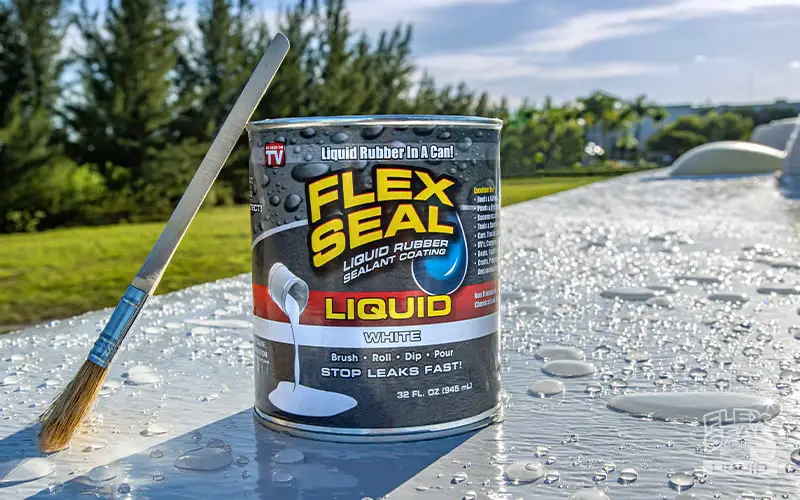
When it comes to repairing RV roof leaks, having the right tools and materials is essential. Roof sealant is a must-have to create a watertight barrier on your RV’s roof. A scrub brush will help you remove any dirt or debris before applying the sealant. A putty knife is useful for spreading the sealant smoothly and evenly. Roof patching material is necessary for larger repairs, such as holes or cracks in the roof. Lastly, a caulking gun will make applying the sealant and patching material easier.
By having these tools and materials on hand, you’ll be ready to tackle any RV roof leak quickly and effectively.
Diy Fixes For Rv Roof Leaks
Repairing RV roof leaks can be a daunting task but with some DIY fixes, you can take care of it yourself. The first step is inspecting and cleaning the roof thoroughly. Check for any cracks, gaps, or loose seams that may be causing the leaks. Then, remove any dirt, debris, and old sealant from the surface.
Next, apply roof sealant to problem areas. Make sure to apply a thin, even layer of sealant over the damaged spots. Use a putty knife to smooth out the sealant and ensure proper adhesion. If there are any holes or tears in the roof, clean the damaged area before applying roof patching material. Seal the patch with more sealant to create a watertight bond.
Regular maintenance and inspection of your RV roof can help prevent leaks in the future. Remember to check for any signs of damage and address them promptly to avoid further issues.
How To Prevent Future Rv Roof Leaks
Regular roof inspections and maintenance are essential for preventing future RV roof leaks. By checking for signs of wear and tear, you can address any issues before they become major problems. Look for cracks, tears, or loose seams that may allow water to seep through. Re-sealing seams and edges regularly can help maintain the integrity of your roof and prevent leaks. Use a high-quality sealant designed for RV roofs and apply it according to the manufacturer’s instructions.
Avoid using harsh cleaning chemicals on your RV roof, as these can damage the surface and increase the risk of leaks. Stick to mild, RV-specific cleaners and a soft brush or sponge for cleaning. When storing your RV, consider protecting the roof with an RV cover. This will shield it from the elements and help prevent damage that could lead to leaks. Following these preventive measures can significantly reduce the risk of RV roof leaks and save you from costly repairs in the future.

Credit: www.epdmcoatings.com
When To Hire A Professional For Rv Roof Leak Repair
When to Hire a Professional for RV Roof Leak Repair
There are certain circumstances where it is best to call in a professional for RV roof leak repair. Extensive roof damage or structural issues should always be handled by an experienced technician. Attempting to fix these issues yourself could lead to further damage and costly repairs. If you lack confidence or experience in DIY repairs, it is wise to seek professional help. Roof leaks can be tricky to pinpoint and fix, and an expert will have the necessary skills and tools to do the job right. Additionally, if you have time constraints or are unable to perform the repairs yourself, hiring a professional is the best option. They will be able to quickly and efficiently address the issue, allowing you to get back to enjoying your RV as soon as possible.
Frequently Asked Questions On Repairing Rv Roof Leaks
How Do You Repair An Rv Roof Leak?
To repair an RV roof leak, start by identifying the source of the leak. Clean and dry the affected area, then apply a strong RV roof sealant, such as EPDM liquid rubber or a self-leveling sealant. Make sure to cover the entire area, including any cracks or seams.
Allow the sealant to cure completely before testing for leaks again.
Can You Fix An Rv Roof Leak Yourself?
Yes, you can fix an RV roof leak yourself with the right tools and materials. However, it’s important to have the necessary knowledge and skills to properly identify and repair the leak. If you’re unsure or uncomfortable with the process, it’s best to consult a professional RV repair service to ensure the leak is properly fixed.
What Causes Roof Leaks In Rvs?
Roof leaks in RVs can be caused by various factors, including aging and deterioration of the roof material, poor installation or maintenance, damage from tree branches or other objects, and cracks or gaps in seams and joints. It’s important to regularly inspect and maintain your RV’s roof to prevent and address any potential leaks.
How Often Should You Inspect Your Rv Roof For Leaks?
It’s recommended to inspect your RV roof for leaks at least once every three to six months, depending on usage and environmental conditions. However, it’s also a good idea to inspect the roof after any significant weather event or if you notice any signs of water damage inside the RV, such as water stains or musty odors.
Conclusion
RV roof leaks can cause major damage if left unattended. By following the steps outlined in this blog post, you can effectively repair these leaks and prevent further issues. Remember to thoroughly inspect and clean the area, apply a reliable sealant, and check for any signs of future leaks.
By taking these proactive measures, you can ensure that your RV remains watertight and protected. Don’t let roof leaks dampen your camping adventures – take action and enjoy worry-free travels!


